
How to Connect WhatsApp to SmartEngage
Connecting your WhatsApp Business number is the step that turns SmartEngage from an empty account into something that can send. It happens once, takes about five minutes, and runs through Meta's Embedded Signup, a window run by Meta rather than by SmartEngage. This guide takes you through it screen by screen, for both ways of connecting, and explains what to do if it does not finish.
SmartEngage
SmartEngage is an Official Facebook Tech Provider, which means your number is linked through Meta's own onboarding and your messages go out on the WhatsApp Cloud API. SmartEngage never asks you to type your number into its own form. You choose it in Meta's window, and Meta verifies it.
There are two paths: keeping the WhatsApp Business app working on a number you already use, or connecting a brand-new number. The first two steps and the last few are the same either way; the middle differs, and both versions are covered below.
Before You Click Anything
Have your phone in hand, your Facebook login ready and, if you are keeping the app, the WhatsApp Business app updated to version 2.24.17 or newer. Closing Meta's window before the end cancels the connection and nothing is saved.
The full list is in Before You Connect WhatsApp: What You Need.
Step 1: Open the Connect Page
Sign in and choose Connect from the sidebar, under Setup. On a new account you can also press Start setup on your dashboard. The page is headed "Connect Your Account" and, until you are linked, shows a card reading "You’re Not Connected Yet".
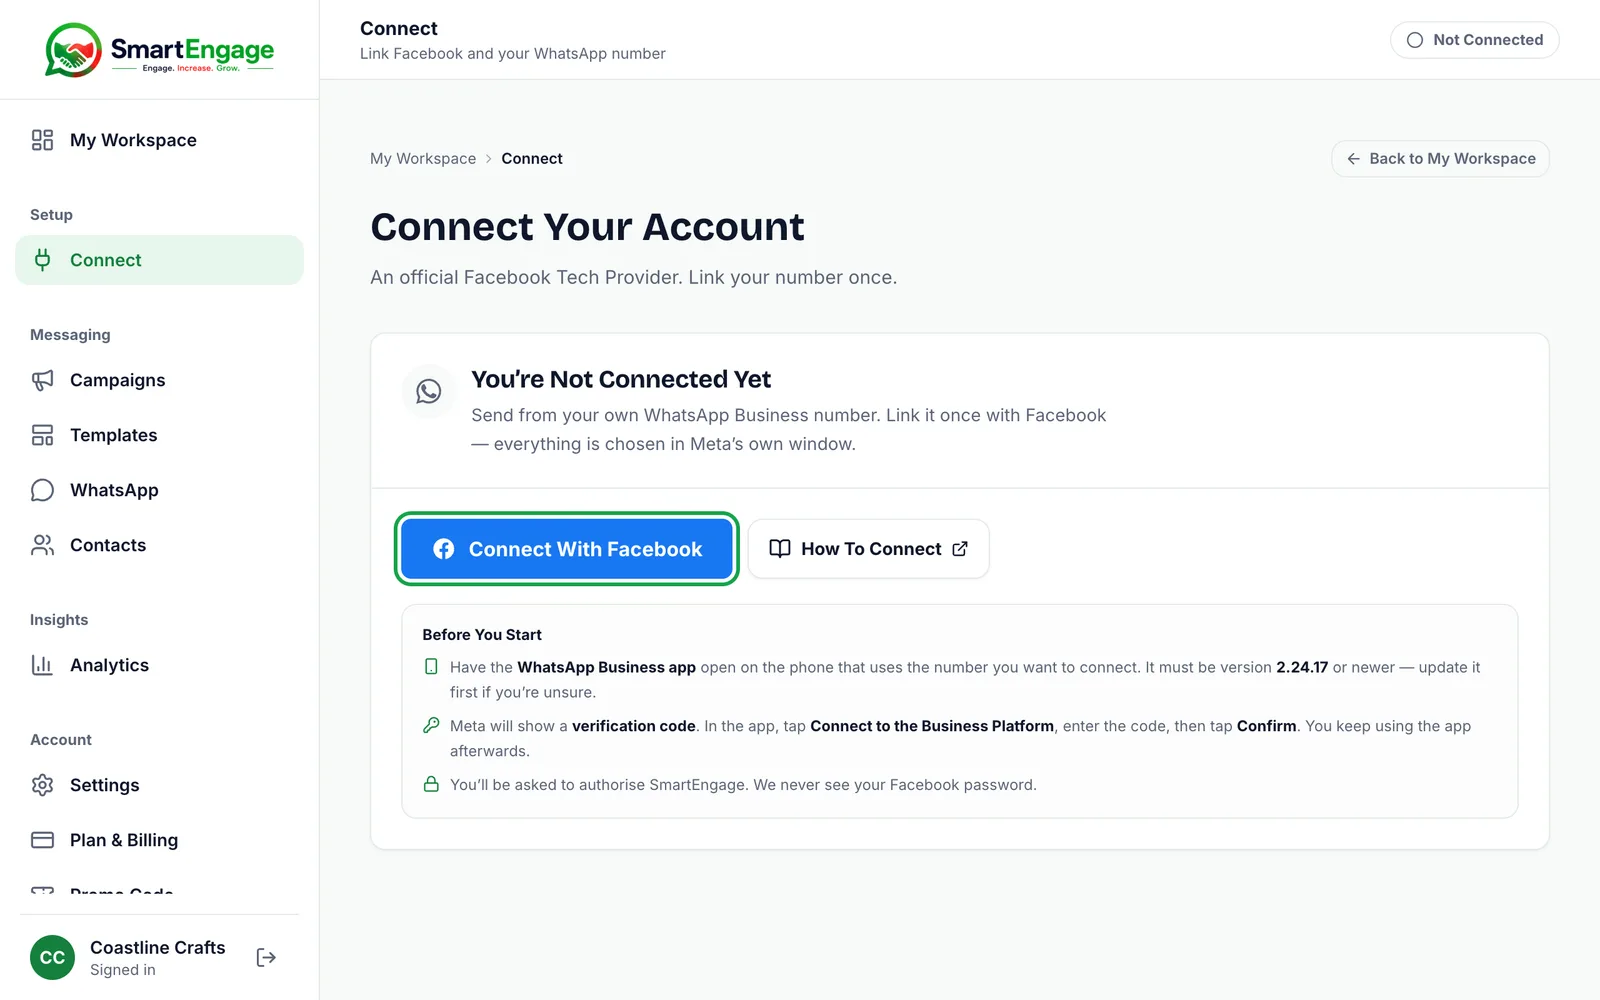
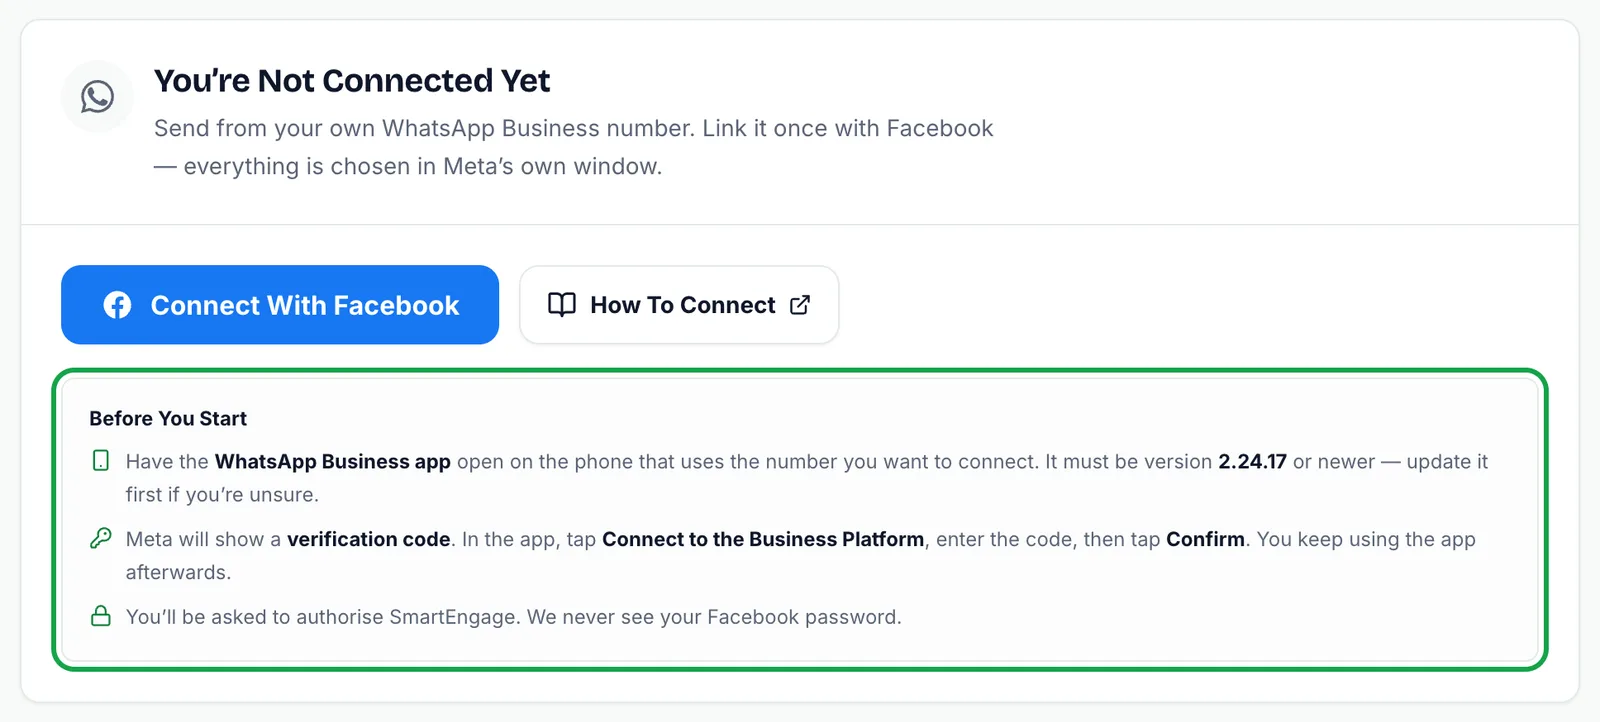
Below the button is a short "Before You Start" note. Beside it, How To Connect opens the illustrated walkthrough in a new tab, so you can read along without leaving this page.
Step 2: Start the Connection
Click Connect With Facebook. The button changes to "Waiting for Facebook…" and Meta's Facebook Login for Business window opens, explaining what happens next. Sign in if asked, read it, then choose Continue.
Keep this window open until the final step.
Step 3: Choose the Phone Number
This is where the two paths split.
- Keeping the WhatsApp Business app: open the Phone number list and pick the number already signed in to the app. Choosing the existing number is what keeps the app working on your phone.
- Brand-new number: leave the list on Enter a new phone number, set the country, type the number, choose how the code should reach you, then choose Next.
Take care here. The list opens on Enter a new phone number and the country box on a default. Both are only defaults. Choosing a new number for a number you use in the app starts the wrong flow, and that number can never be used in the WhatsApp Business app again.
Step 4: Confirm Your Business Details
Keeping the app: Meta shows the business profile it found for your number, including the name and what customers already see. Check it is the right business and choose Next. If it is the wrong number, choose Back and change it rather than carrying on.
Then select the business portfolio that owns this number. If you only have one, it is already selected. Finally, check the WhatsApp Business account name customers will see and set the correct time zone.
Brand-new number: leave the lists on Create a Business portfolio and Create a WhatsApp Business account, or pick your existing portfolio if your business already has one. Then enter your business name, email, category, country and time zone. The website is optional.
On either path, the portfolio you choose is the one that pays for sending, so pick the right one.
Step 5: Prove You Hold the Number
Keeping the app: open WhatsApp Business on your phone and tap Connect on the message from the official Facebook Business Account. If it is not there, look under Settings, then Account, then Business Platform. Then either scan the QR code on screen, or choose to enter a code, type the one shown and tap Confirm.
This step shares your business profile, contacts and the last six months of chat history with the connection. You keep full use of the app afterwards.
Brand-new number: Meta sends a six-digit code by SMS or phone call. Enter it in the window. If it does not arrive, you can request another after thirty seconds.
Step 6: Confirm the Permissions
Meta lists what is being shared and what SmartEngage will be able to do with it. Review it and choose Confirm to grant access. You sign in to Meta, not to SmartEngage, so your Facebook password is never shared with us.
Step 7: Let Meta Finish
Meta now links the number to the WhatsApp Cloud API. It takes a few moments and needs nothing from you; if it stalls, use Retry.
A confirmation screen then shows the account is connected. It offers to add a payment method. You can do it now or later, but messages will not send until one is attached. Choose Finish to close the window.
Step 8: Check the Connect Page
Back in SmartEngage, the button reads "Finishing Setup…" while the connection is saved. When it is done you see one of two things:
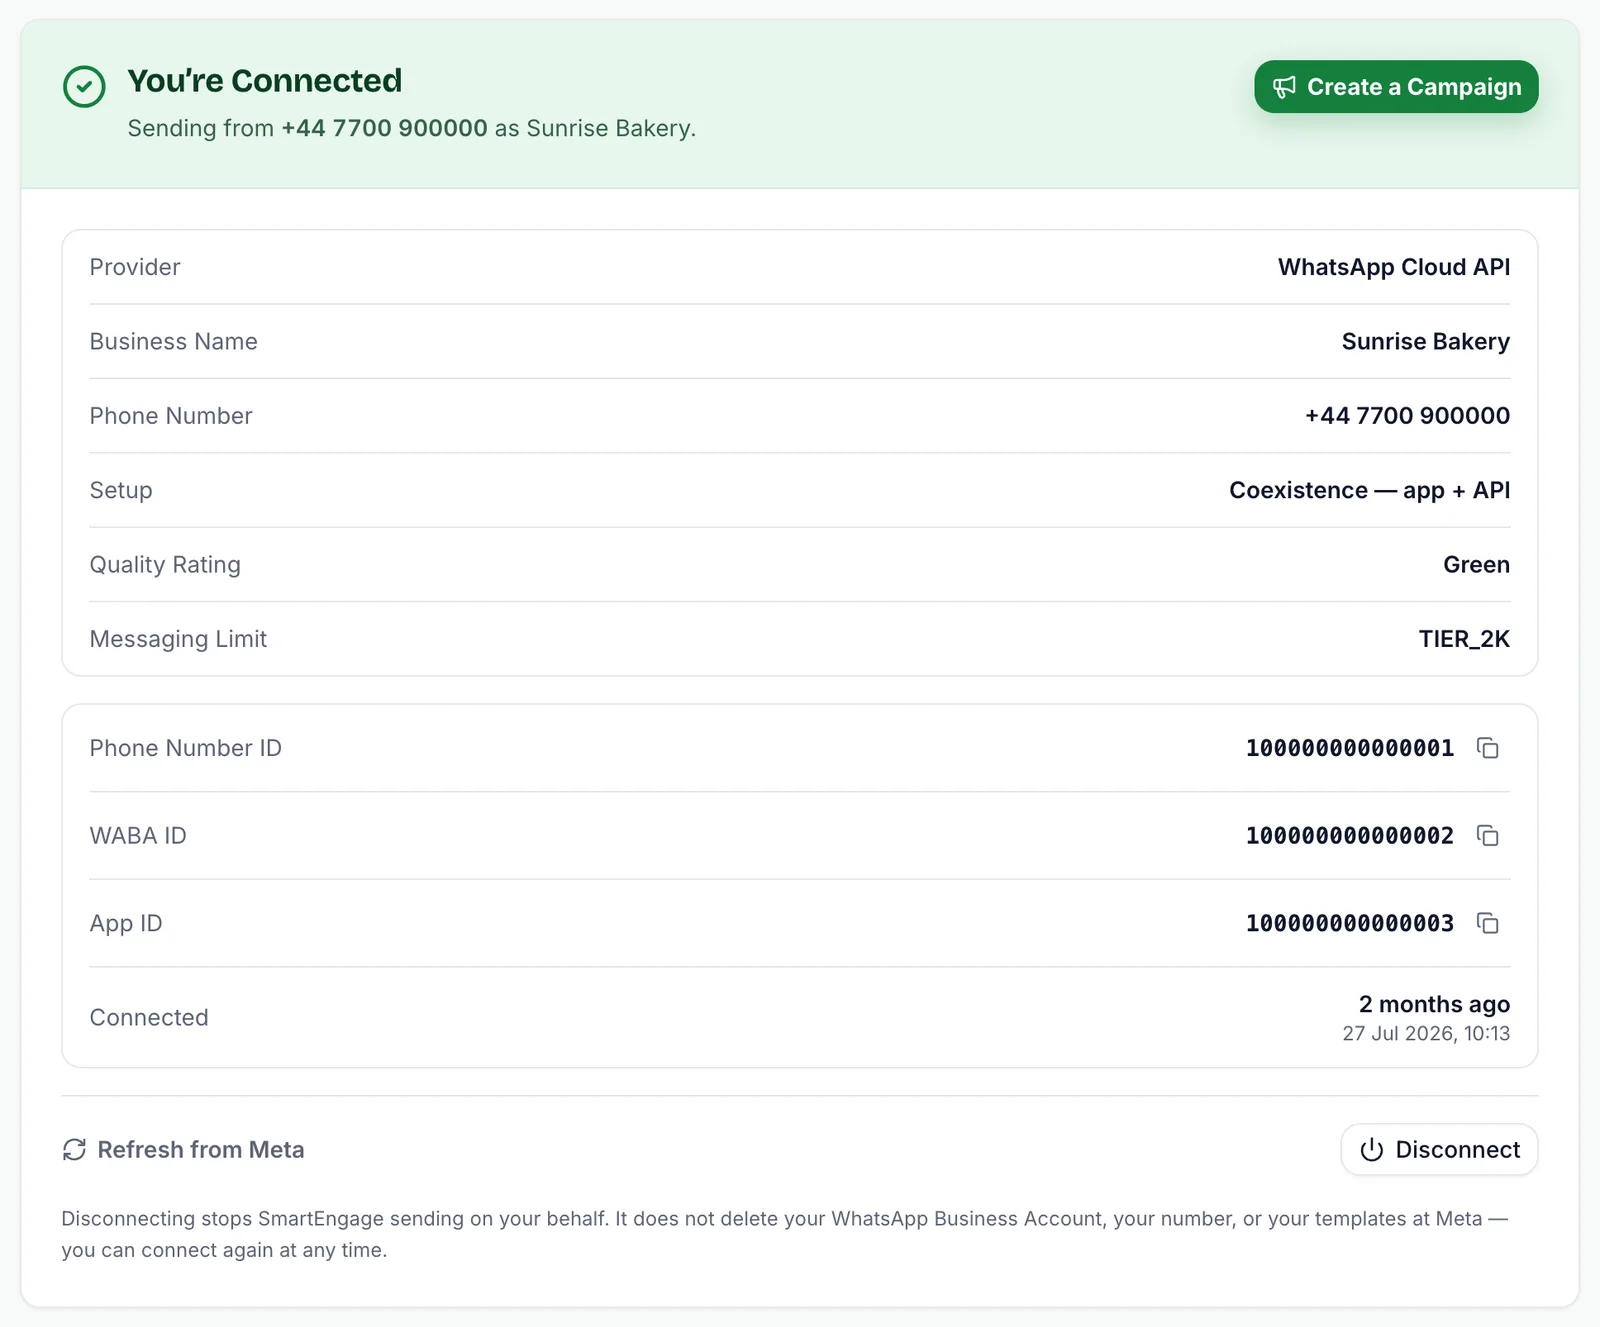
- "You’re Connected": a green panel showing the number you are sending from and your business name, with details such as quality rating and messaging limit. You are ready.
- "Almost There": your WhatsApp Business Account is linked and Meta is still confirming the number. This usually takes a moment. Choose Check Again to look for an update.
If Meta reports that no payment method is attached, a warning titled "Add a Payment Method in Meta" appears above the panel. Deal with that next.
If Setup Does Not Finish
When something goes wrong, the Connect page shows a "Setup Didn’t Finish" message with the reason. The common ones:
- The window was closed early. The message names the step it was closed at and confirms nothing was saved. Click Connect With Facebook and start again.
- "Could not load Facebook. Check your connection or any ad blocker, then retry." A browser extension is blocking Meta's window.
- The number or WhatsApp Business Account is already connected to a different SmartEngage account. Disconnect it there first, then link it here.
- "You can only connect your previously connected WhatsApp Business Account", followed by its WABA ID. Your account is tied to the business account it connected before; choose that one in Meta's window.
If you land on "Almost There" and it does not move, choose Start over to clear the partial link and run the connection again.
For every message and its fix, see Troubleshooting WhatsApp Connection Problems.
What Connecting Starts
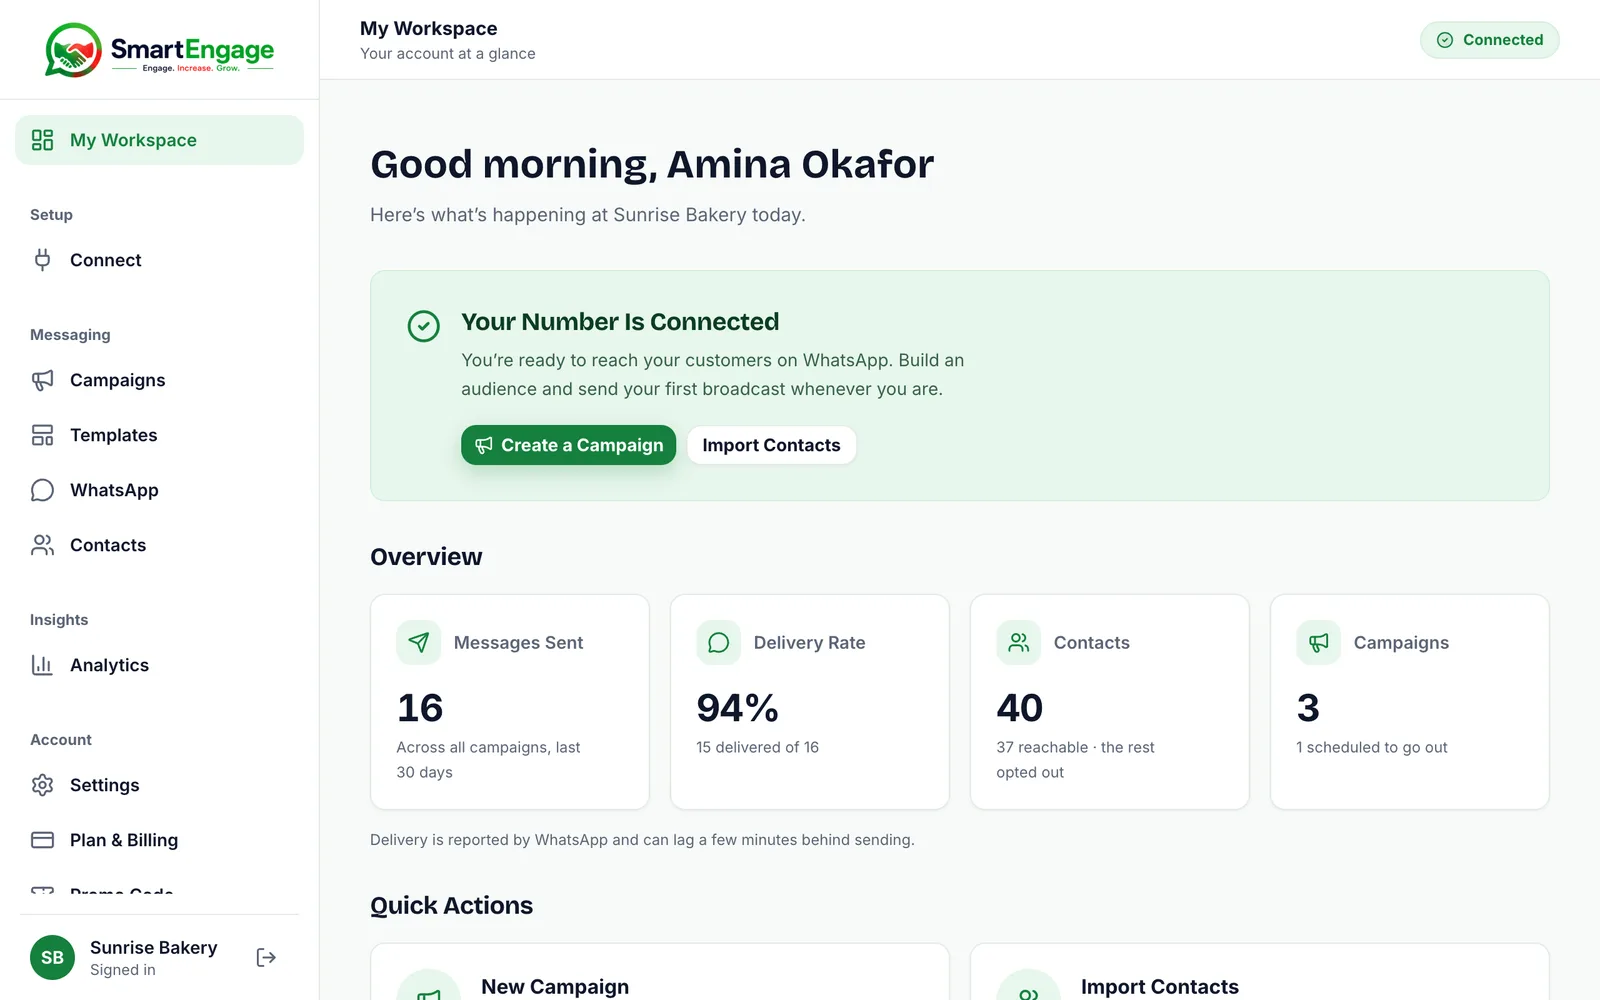
Connecting your number is also what starts your free trial. It begins at this moment rather than at sign-up, so none of it is spent waiting for Meta. Your dashboard then shows Your number is connected, with buttons to import contacts and create a campaign.
Trial length and plans are on our pricing page.
Next Steps
Make sure messages can actually send: How to Add a Payment Method for WhatsApp.
Then confirm every detail with How to Check Your Connection and Sending Number.
Still deciding between the two paths? Read Coexistence or API-Only.
Tagged
Getting StartedSetupWhatsApp MarketingReady to send safely?
Start free — no new number, no setup fee, no card required.
Keep Reading
 Account & WhatsApp Setup5 min read
Before You Connect WhatsApp: What You Need
Most failed WhatsApp connections fail for a reason that could have been fixed beforehand. Here is what to have in hand before you click Connect With Facebook.
Read guide Troubleshooting6 min read
Fixing Contact Import Problems
Symptom-by-symptom fixes for SmartEngage contact imports: files that will not upload, wrong column mapping, rejected numbers, duplicates and imports that stop.
Read guide Account & WhatsApp Setup5 min read
How to Add a Payment Method for WhatsApp
Connected but nothing sends? Meta bills WhatsApp messages itself, and needs a payment method on the right business portfolio. Here is how to add one and confirm it in SmartEngage.
Read guide