How to Create a Message Template
Before you can send a WhatsApp campaign, you need a message template that Meta has approved. This guide walks through the SmartEngage template composer one field at a time, with the limits Meta enforces at each step, so your first submission has the best chance of being approved.
SmartEngage
You do not need to know Meta's rules by heart to write a template in SmartEngage. The composer checks them as you go and shows a live preview of what your customer will see. What helps is knowing what each field is for, and which choices are hard to undo once Meta has approved the template.
You will need a connected WhatsApp number first. Until one is connected, the Templates page asks you to connect WhatsApp instead of showing the composer.
Step 1: Open New Template
Go to Templates and select "New Template". The page offers three ways to start, in the order they are worth trying:
- Use One You Already Have: your approved templates. You can use one as it stands, or choose "Duplicate & Edit" to start a new template from its wording.
- Start From a Ready-Made Template: pick what you want to say, such as Promotions & Offers, Abandoned Cart or Appointments, then choose "Use this template" on one of the ready-to-use templates.
- Or Write Your Own: "Write From Scratch" opens a blank composer, and "Create in Meta" opens Meta's own template tool in a new tab.
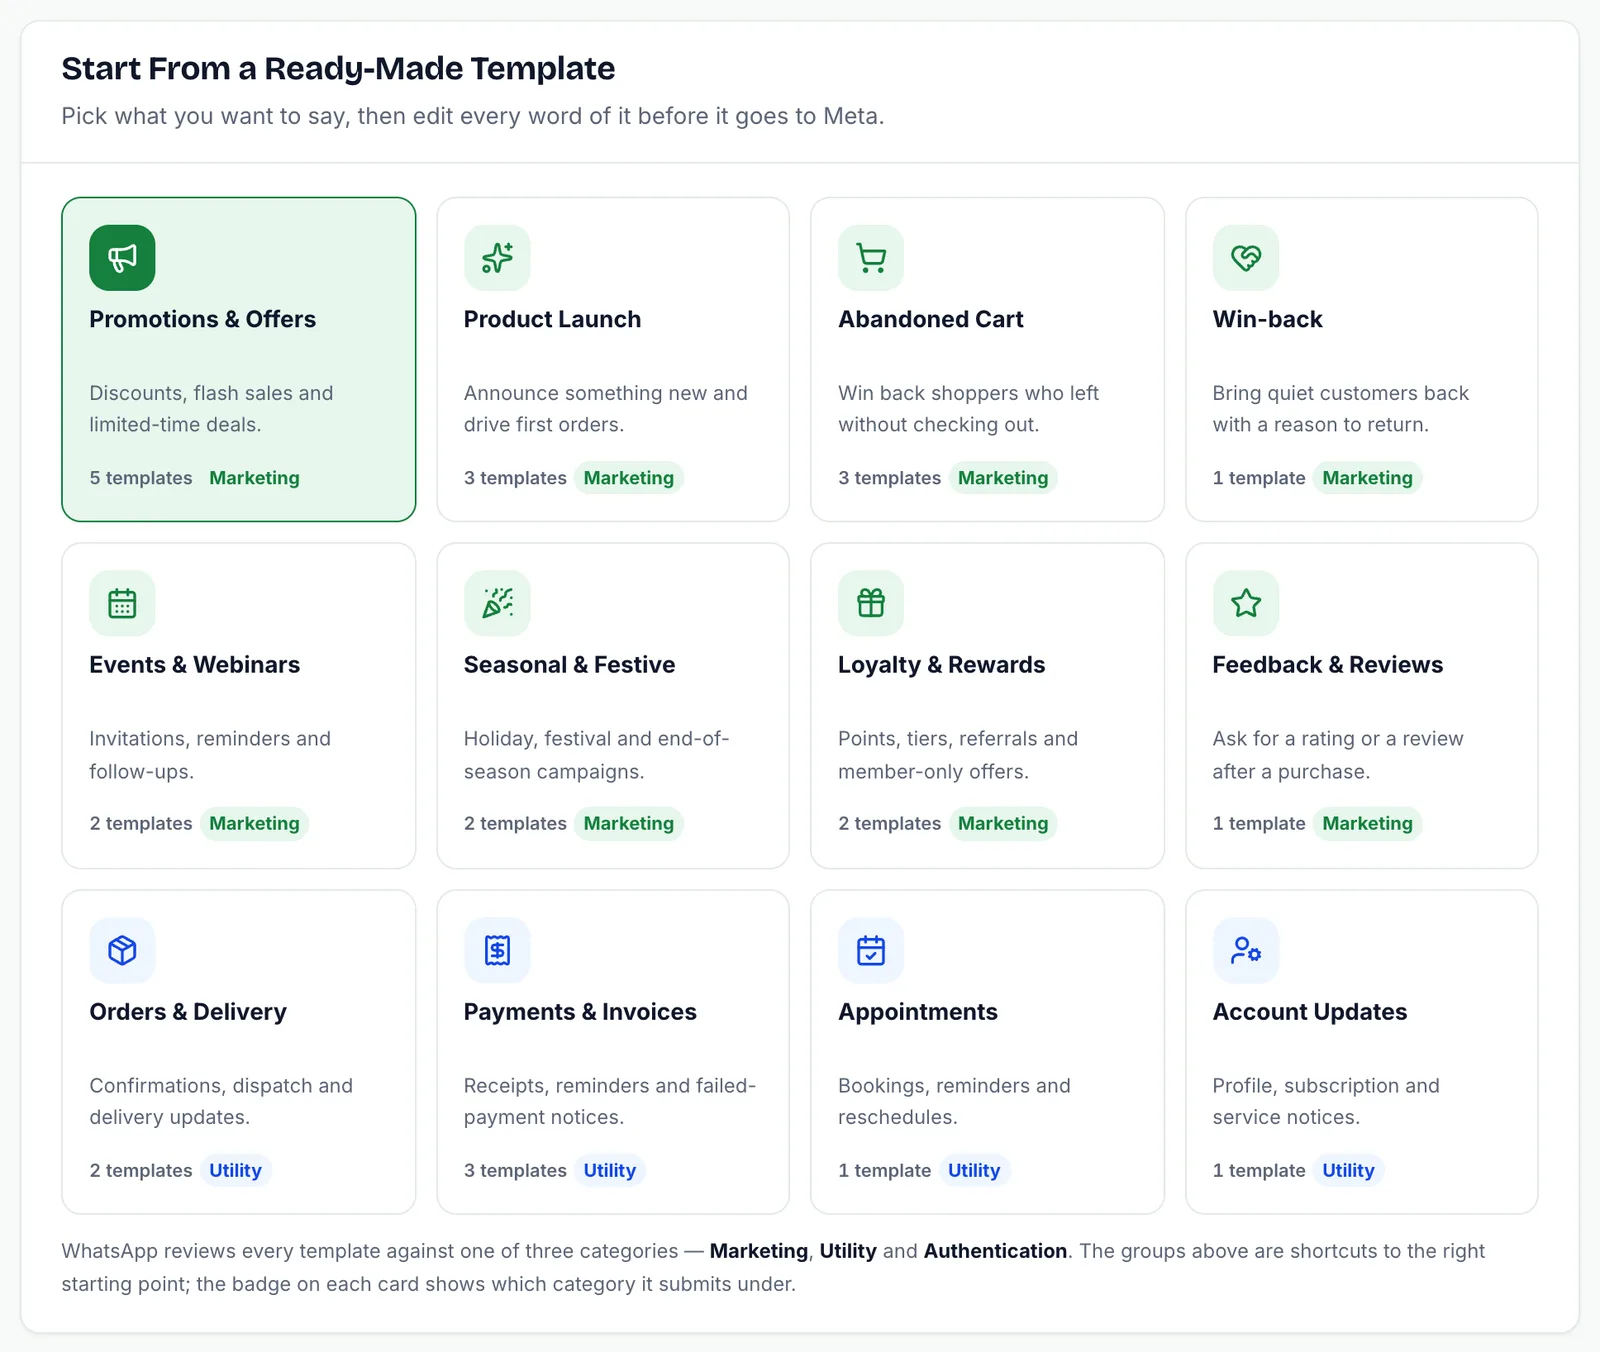
A ready-made template is a starting point, not a fixed message. Every word stays editable before it goes to Meta.
Step 2: Choose What the Template Is For
The first question in the composer is "What Is This Template For?". You choose one of two categories:
- Marketing: promotions, offers and announcements. It needs opt-in and is billed at the marketing rate.
- Utility: updates about something the customer already did, such as orders, bookings and receipts.
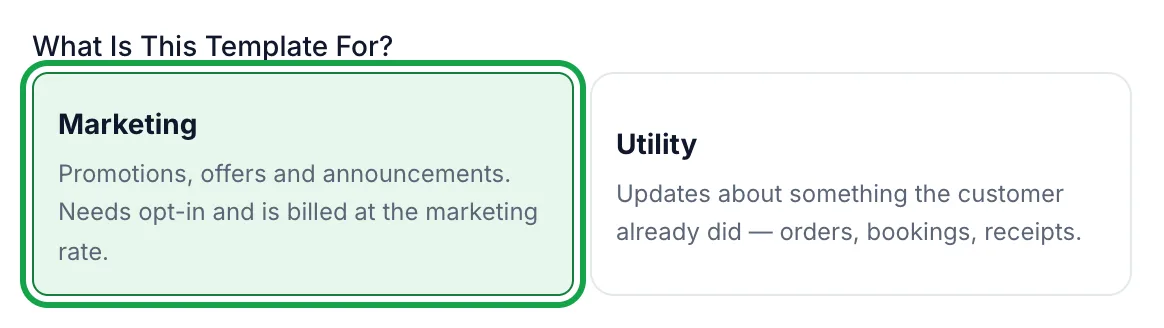
Pick the category that honestly matches the message. A promotion submitted as utility is a common reason for rejection. Authentication templates are not written here, because Meta composes those itself; create one in WhatsApp Manager and sync it in if you need it.
To bring in an authentication template, see How to Sync Your Templates from Meta.
Step 3: Name the Template and Pick a Language
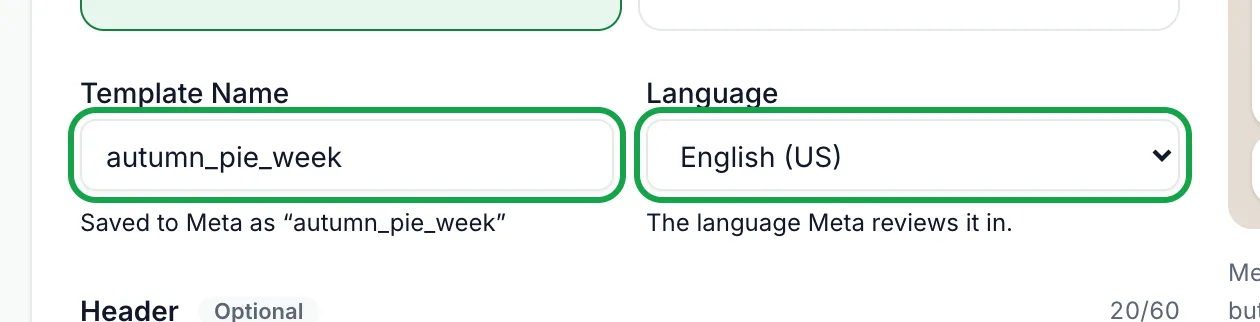
Type a plain-English name in "Template Name", such as Spring Sale. SmartEngage converts it into the format Meta requires, lowercase letters, numbers and underscores, and shows you the result underneath: "Saved to Meta as spring_sale".
Choose the language Meta should review it in from the Language list. Meta requires each name to be unique within a language, so choose a name you will recognise later. If you ever delete a submitted template, Meta locks its name for 30 days.
Step 4: Add a Header (Optional)
The header sits above the message. Choose one of five options: None, Text, Image, Video or Document.
- Text: a single line of up to 60 characters.
- Image: JPG or PNG, up to 5 MB. Landscape images display best, because WhatsApp crops tall ones.
- Video: MP4 or 3GP, up to 16 MB. Use H.264 video with AAC audio, as other codecs may not play.
- Document: PDF, Word, Excel, PowerPoint or plain text, up to 100 MB.
For a media header you must upload a sample file. Meta reviews the template with that sample, and it is also the file your campaigns send with every message, so upload the real image or document rather than a placeholder. SmartEngage checks the file and sends it straight to Meta; you will see its name with "sample sent to Meta" once it has uploaded.
Keep a text header fixed. The composer has no field for a header example, so a {{1}} in the header cannot be submitted from here.
Step 5: Write the Message
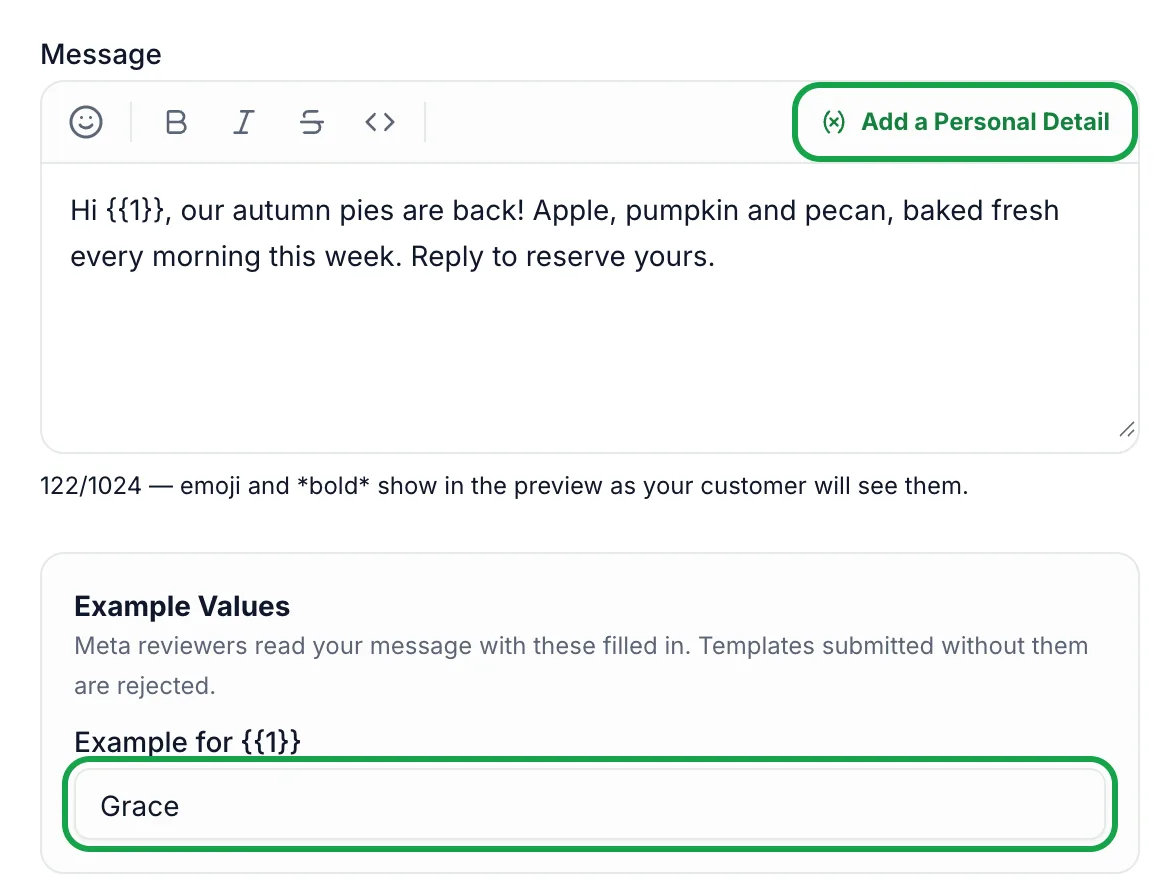
The Message box holds the body of the template, up to 1,024 characters. The toolbar can make a selection Bold, Italic, Strikethrough or Monospace, and emoji and formatting show in the preview exactly as your customer will see them.
To personalise the message, place your cursor where a detail should go and select "Add a Personal Detail". SmartEngage inserts the next numbered variable, {{1}} for the first, {{2}} for the second, up to 10 in one message. Keep these rules in mind:
- Do not start or end the message with a variable. Write "Hi {{1}}," rather than "{{1}}, hi", and add something after the last one, even a full stop.
- Put words between variables. Two side by side are rejected.
- Use numbered variables only. Named ones such as {{name}} are not supported.
Step 6: Fill In the Example Values
As soon as the message contains a variable, an Example Values panel appears with one field per variable, such as "Example for {{1}}". Meta's reviewers read your message with these filled in, and templates submitted without them are rejected.
Use realistic values: a first name for a name, a plausible order number for an order. Each example must be a single line of up to 200 characters, with no tabs and no double spaces.
Step 7: Add a Footer (Optional)
The footer is a short line under the message, up to 60 characters. It is the same for every recipient, so it cannot contain a variable.
For marketing templates, the footer is a good place for an opt-out line such as "Reply STOP to opt out". A clear way out is what keeps people from blocking your number instead.
Step 8: Add Buttons (Optional)
Select "Add Button" to add up to three. Each has a type and a label of up to 25 characters:
- Quick reply: a button the customer taps to answer you.
- Open a link: opens a web address. Enter the full address, beginning with https. Up to two per template.
- Call a number: dials a phone number in international format, starting with a plus sign. Only one per template.
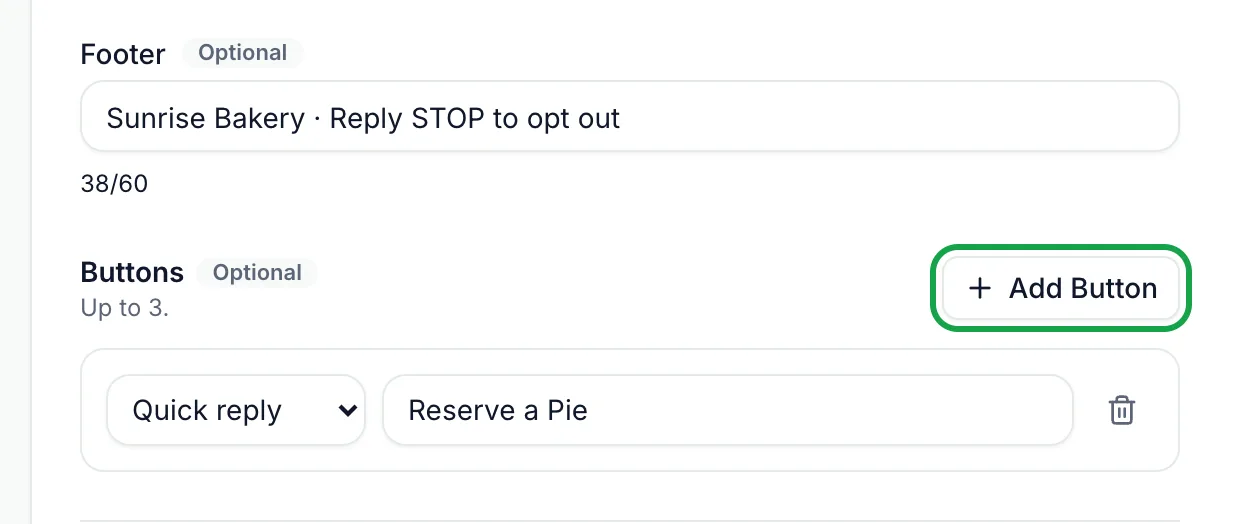
Two buttons on the same template cannot share a label, because a customer could not tell them apart. Use a fixed link rather than one that changes per customer, as SmartEngage campaigns cannot yet fill in a link variable.
Step 9: Check the Customer Preview
The Customer Preview beside the form updates as you type. It shows the header, the message with your example values in place, the footer and the buttons, laid out like a WhatsApp chat.
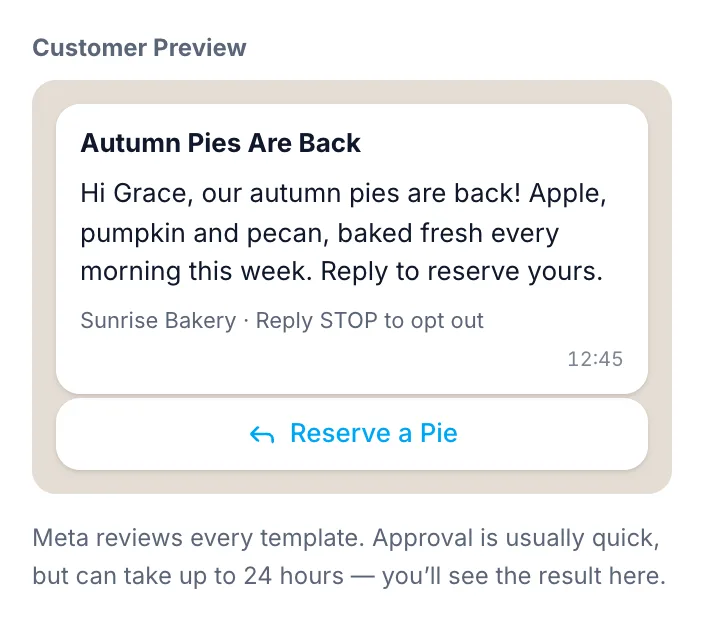
Read it as your customer would. If it looks vague or confusing with the examples filled in, a Meta reviewer will think the same.
Step 10: Submit for Approval or Save as Draft
When you are happy, select "Submit for Approval". SmartEngage checks every rule above first. If something would be rejected, nothing is sent to Meta and nothing is used up; a notice at the top says how many things need fixing, and each problem is marked on its field.
If the checks pass, you will see "Template Submitted". The template waits under In Review until Meta answers, usually within minutes and occasionally up to 24 hours, then moves to Approved or Rejected.
Not ready yet? "Save as Draft" keeps your work in SmartEngage without sending it to Meta. A draft needs only a name and some message text, and it waits under Drafts until you finish it.
What to Do Next
Once the template is approved, you can use it in a campaign straight away.
Next step: How to Create a WhatsApp Campaign.
If Meta declines it, read Why Templates Get Rejected and How to Fix Them.
For how statuses and categories work, see How WhatsApp Message Templates Work.
Tagged
ApprovalGetting StartedTemplatesReady to send safely?
Start free — no new number, no setup fee, no card required.
Keep Reading
 Account & WhatsApp Setup5 min read
Before You Connect WhatsApp: What You Need
Most failed WhatsApp connections fail for a reason that could have been fixed beforehand. Here is what to have in hand before you click Connect With Facebook.
Read guide Troubleshooting6 min read
Fixing Contact Import Problems
Symptom-by-symptom fixes for SmartEngage contact imports: files that will not upload, wrong column mapping, rejected numbers, duplicates and imports that stop.
Read guide Account & WhatsApp Setup5 min read
How to Add a Payment Method for WhatsApp
Connected but nothing sends? Meta bills WhatsApp messages itself, and needs a payment method on the right business portfolio. Here is how to add one and confirm it in SmartEngage.
Read guide