
How to Import Contacts from a CSV File
A CSV file is the most common way a contact list arrives: exported from a spreadsheet, an online shop, a CRM or a phone. This guide covers preparing the file, uploading it, checking how its columns were matched, reviewing the preview and running the import, with what you see at each step.
SmartEngage
SmartEngage never imports a file blind. After you upload, you see how the columns were read, how many contacts are new, how many you already hold and which rows cannot be used, before a single contact is written. Nothing is imported until you choose to.
Step 1: Prepare Your File
Your file needs one column that SmartEngage must have: the WhatsApp number. Everything else is optional.
- Save the file with a .csv extension. Commas, semicolons, tabs and pipes are all recognised as separators, so a European export saved with semicolons works as it is.
- Put column names in the first row, such as Phone, Name and Email. Columns named like this are matched automatically.
- Include country codes where you can, for example +254712345678. Numbers without one can still be imported if they all come from one country, as explained in step 3.
- If you track consent, add an opt-in column with values such as yes or no. Without one, everyone in the file is imported as opted in.
Extra columns such as company, job title, address, website, notes or tags are recognised too, when your file has them. UTF-8, UTF-16 and Latin-1 files are all read, so accented names come through correctly.
CSV exports from Google Contacts and Outlook can be uploaded as they are. There is no need to rearrange the columns first.
Protect Numbers From Excel
If you edit the CSV in Excel, format the phone column as Text before saving. Excel treats a long number as a quantity and saves it in a form like 9.19877E+11, keeping only the first six digits. The rest are lost from the file for good, and SmartEngage will flag those rows as damaged by Excel rather than import a wrong number.
Step 2: Open the Import Panel and Choose a Book
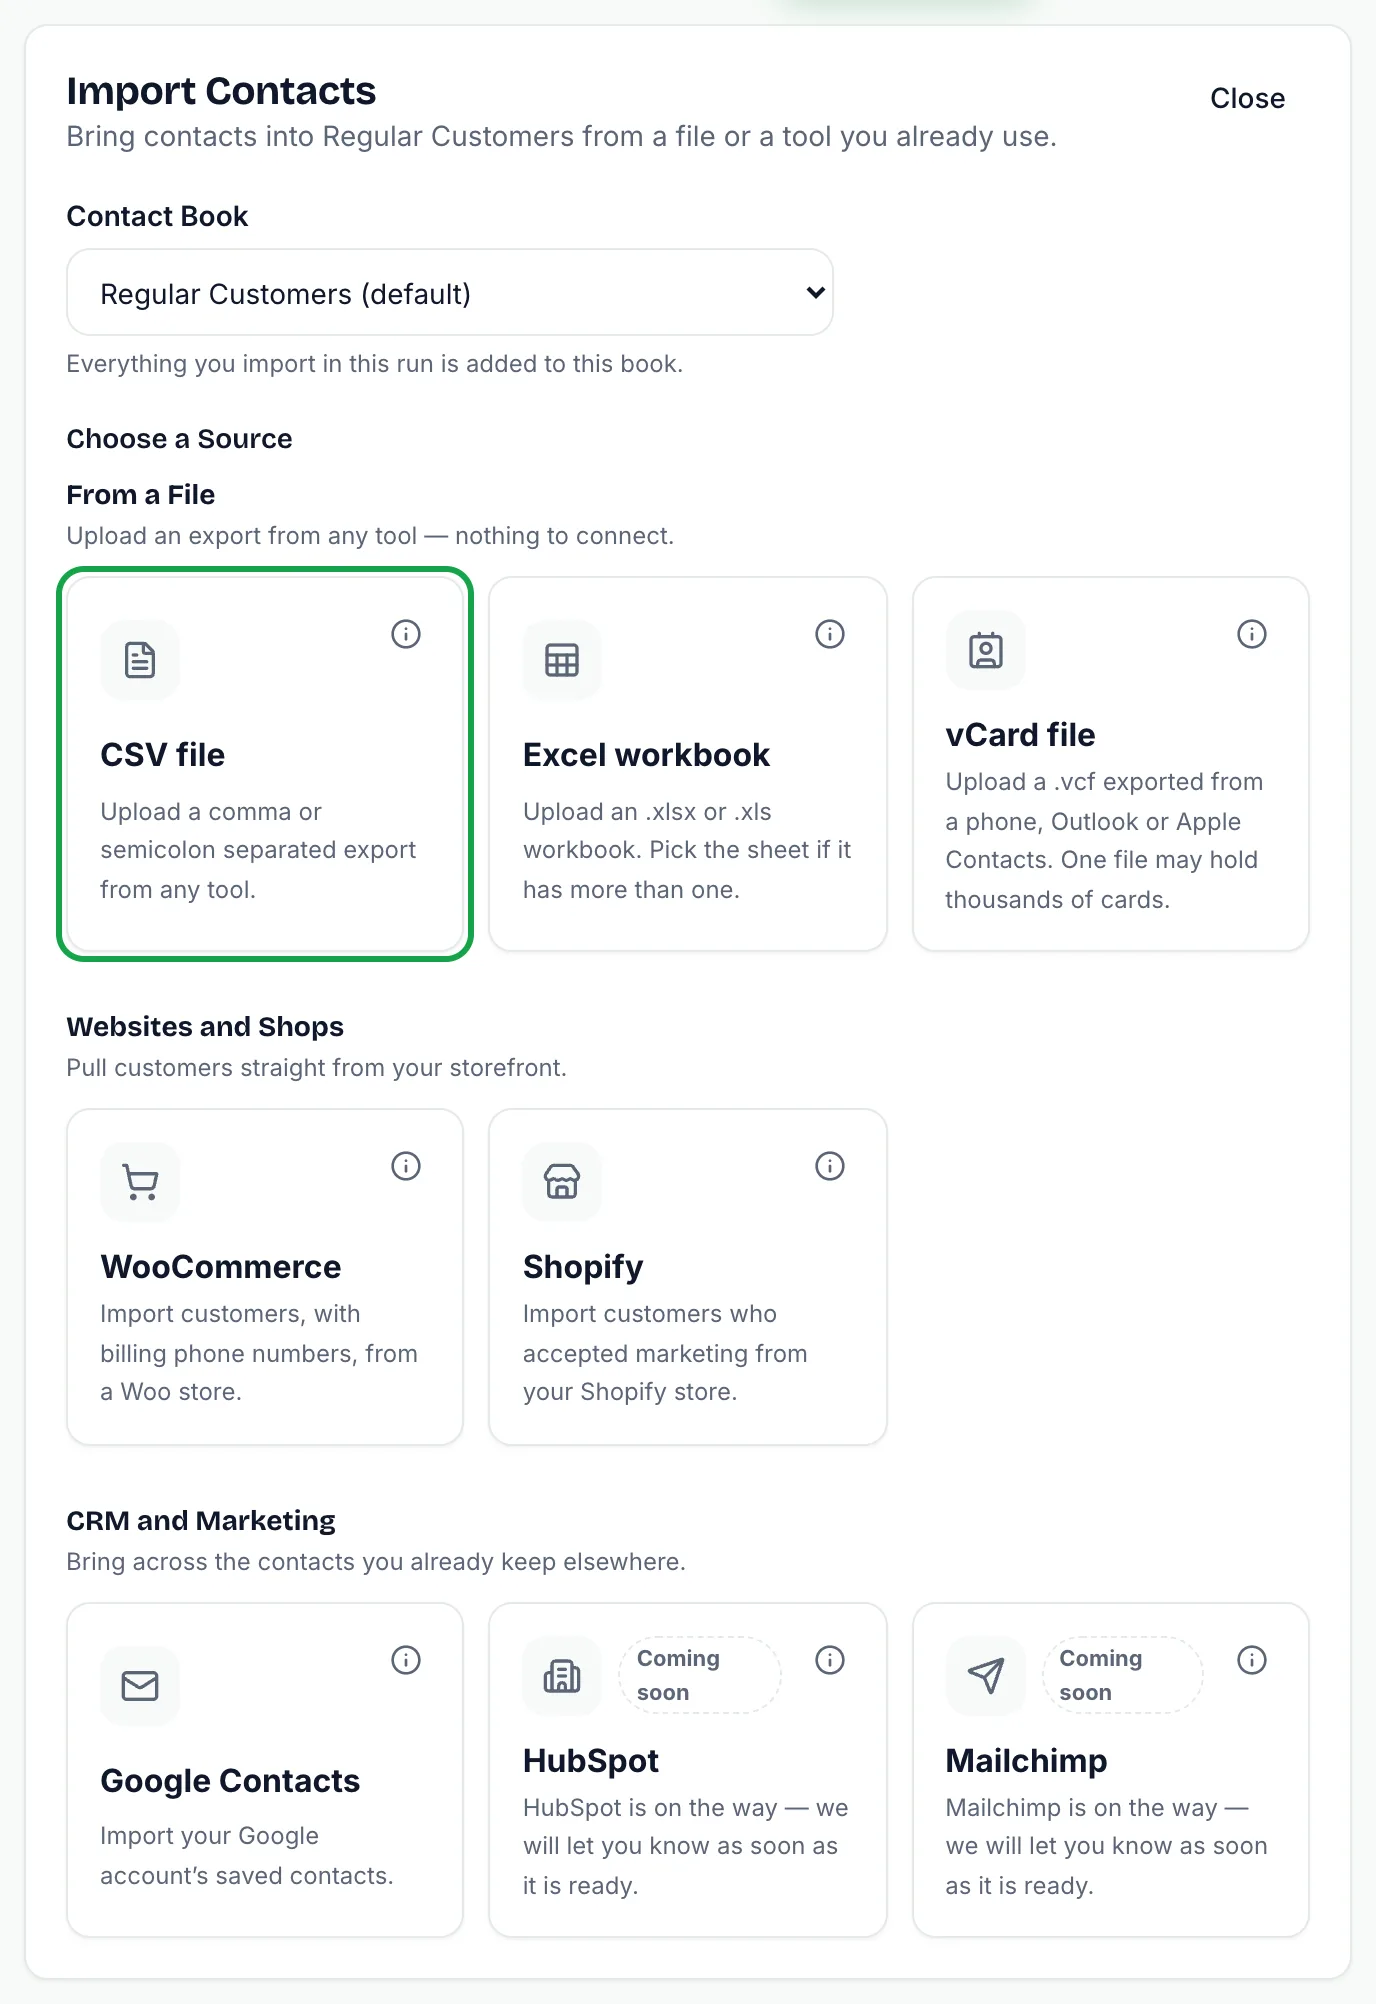
Go to the Contacts page and select "Import Contacts". The import panel opens with a Contact book picker at the top. Choose the book the contacts should join. Everything you import in this run is added to that book.
Want a separate list for these contacts? First see How to Create and Manage Contact Books.
Under "Choose a Source", select "CSV file" from the file options.
Step 3: Set the Country and Upload
Before uploading, check the setting "Numbers without a country code are from". SmartEngage uses it for any number in the file that does not start with + or 00. A leading 0 is dropped and the country code added, so 0712345678 with Kenya selected becomes +254712345678. Numbers that already start with + keep their own country code.
Then select "Choose File" and pick your CSV. Files up to 25 MB can be uploaded. You will see the upload progress, then the preview.
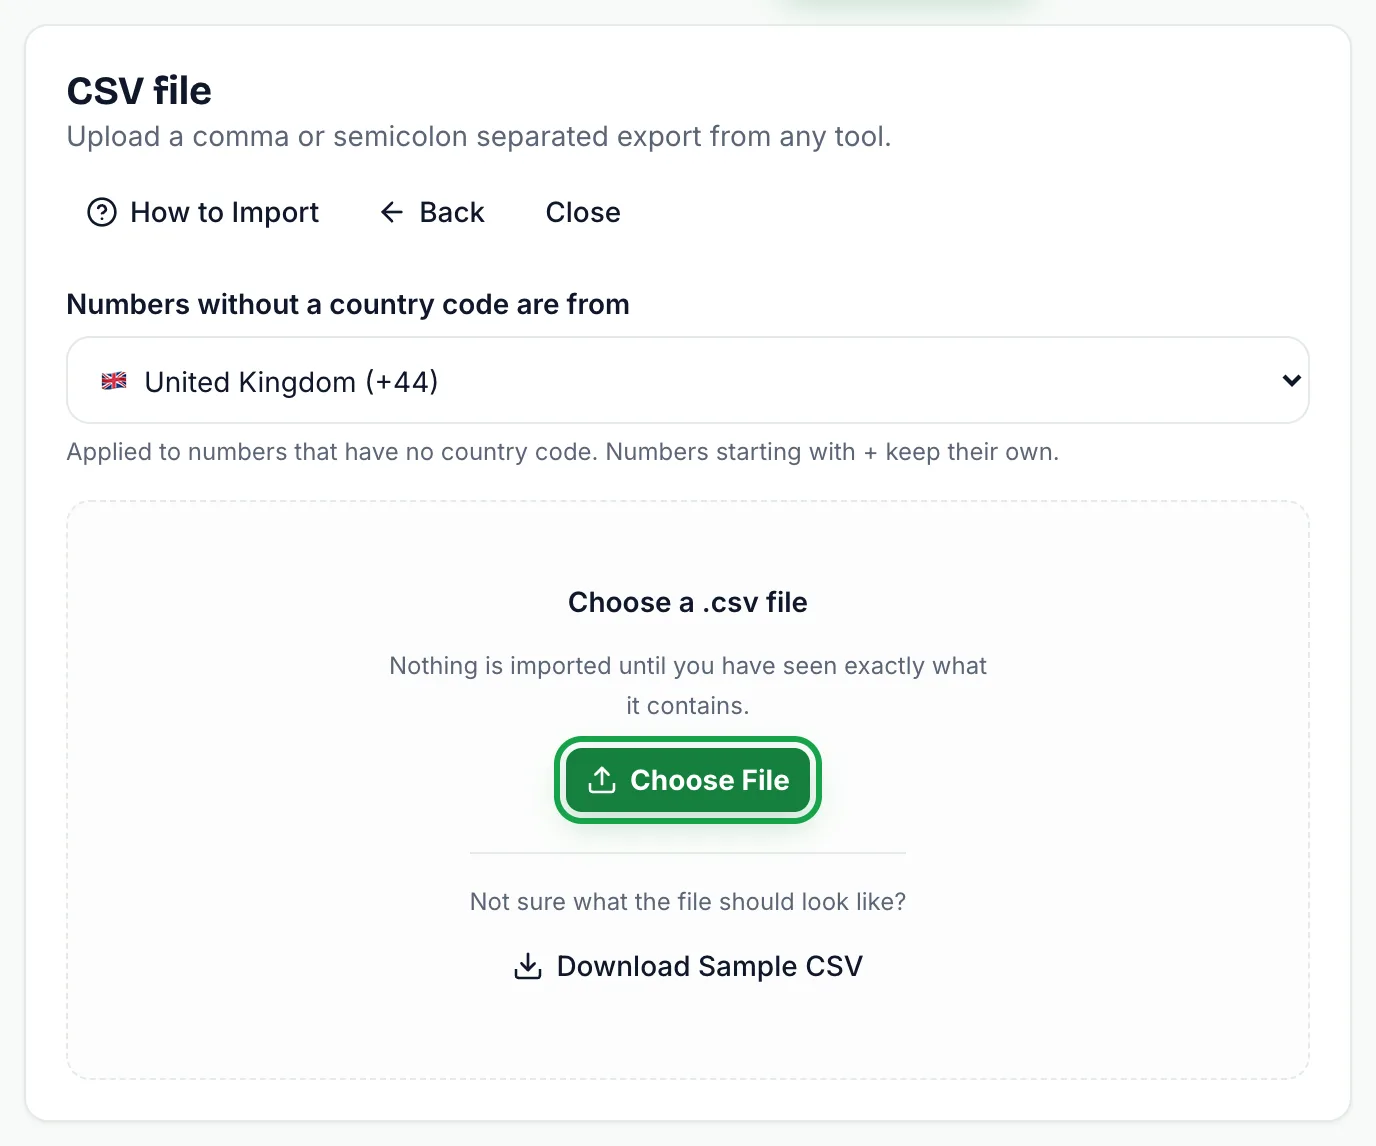
Not sure how the file should look? Below the upload button, select "Download Sample CSV" for a ready-made example you can copy. For step-by-step help at any point, select "How to Import" at the top of the panel.
Step 4: Check the Column Mapping
The preview opens with a Column mapping box. When SmartEngage recognises your columns, it says it matched them automatically. Select "Change Columns" to see or adjust each match:
- WhatsApp number: required. Rows without one cannot be imported.
- Name: a first-name column is enough, as a surname column is joined on automatically.
- Email: also used to spot duplicates.
- Company, Job title, Address, Website and Notes
- Opt-in: yes or no, true or false, 1 or 0, or subscribed or unsubscribed
- ID in the source: lets a repeat import update rather than duplicate
- Tags: a list, or values separated by commas
Each field has a drop-down of your file's columns, with sample values underneath so you can see what a column holds. Choose "— not imported —" to leave a field out. When you have made changes, select "Apply Mapping" and the preview is rebuilt from the file you already uploaded.
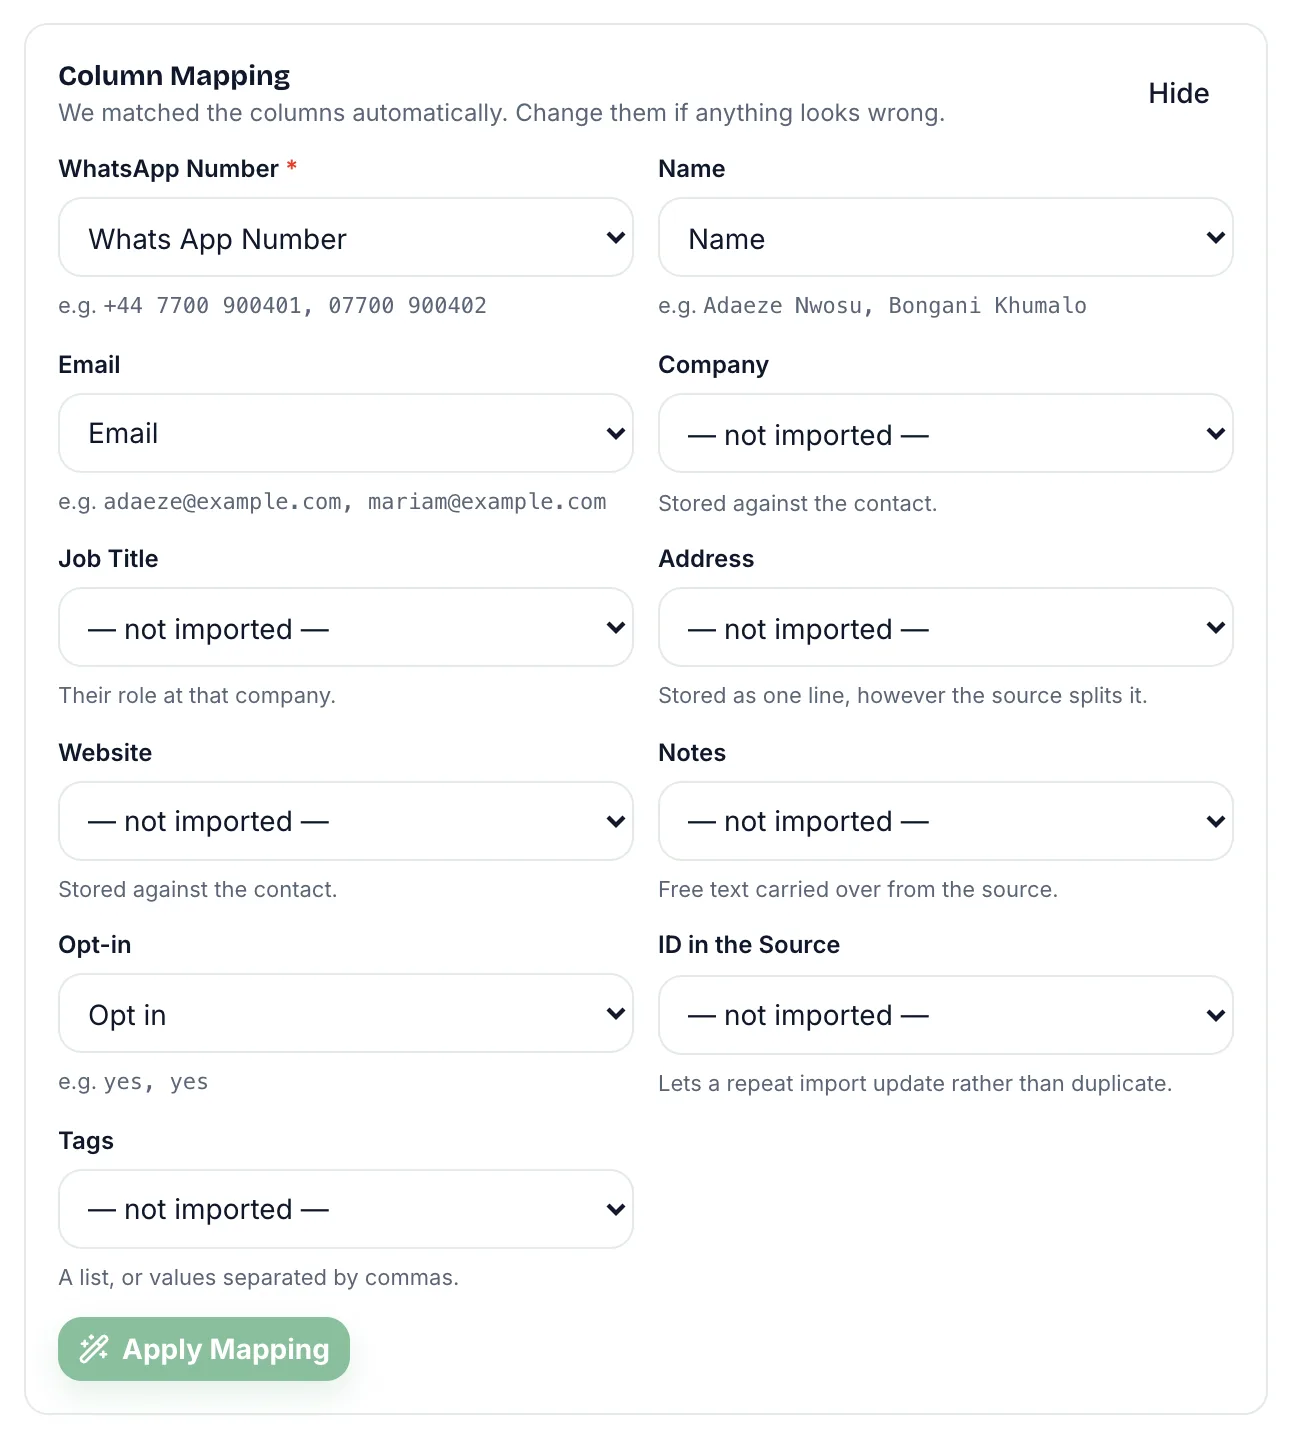
If SmartEngage could not tell which column holds the number, the mapping box opens by itself and warns that without a number column nothing can be imported. Pick the right column and apply.
A file without a header row still works. Its columns are listed by position and you map them by hand.
Step 5: Review the Preview
Four tiles summarise the file: Found, New contacts, Duplicates and Cannot import. Select a tile to filter the list below it to those rows. The list shows every contact with its number, marked where it is a duplicate or cannot be imported, along with the reason, such as "Number Not Usable" or "Repeated in This File".
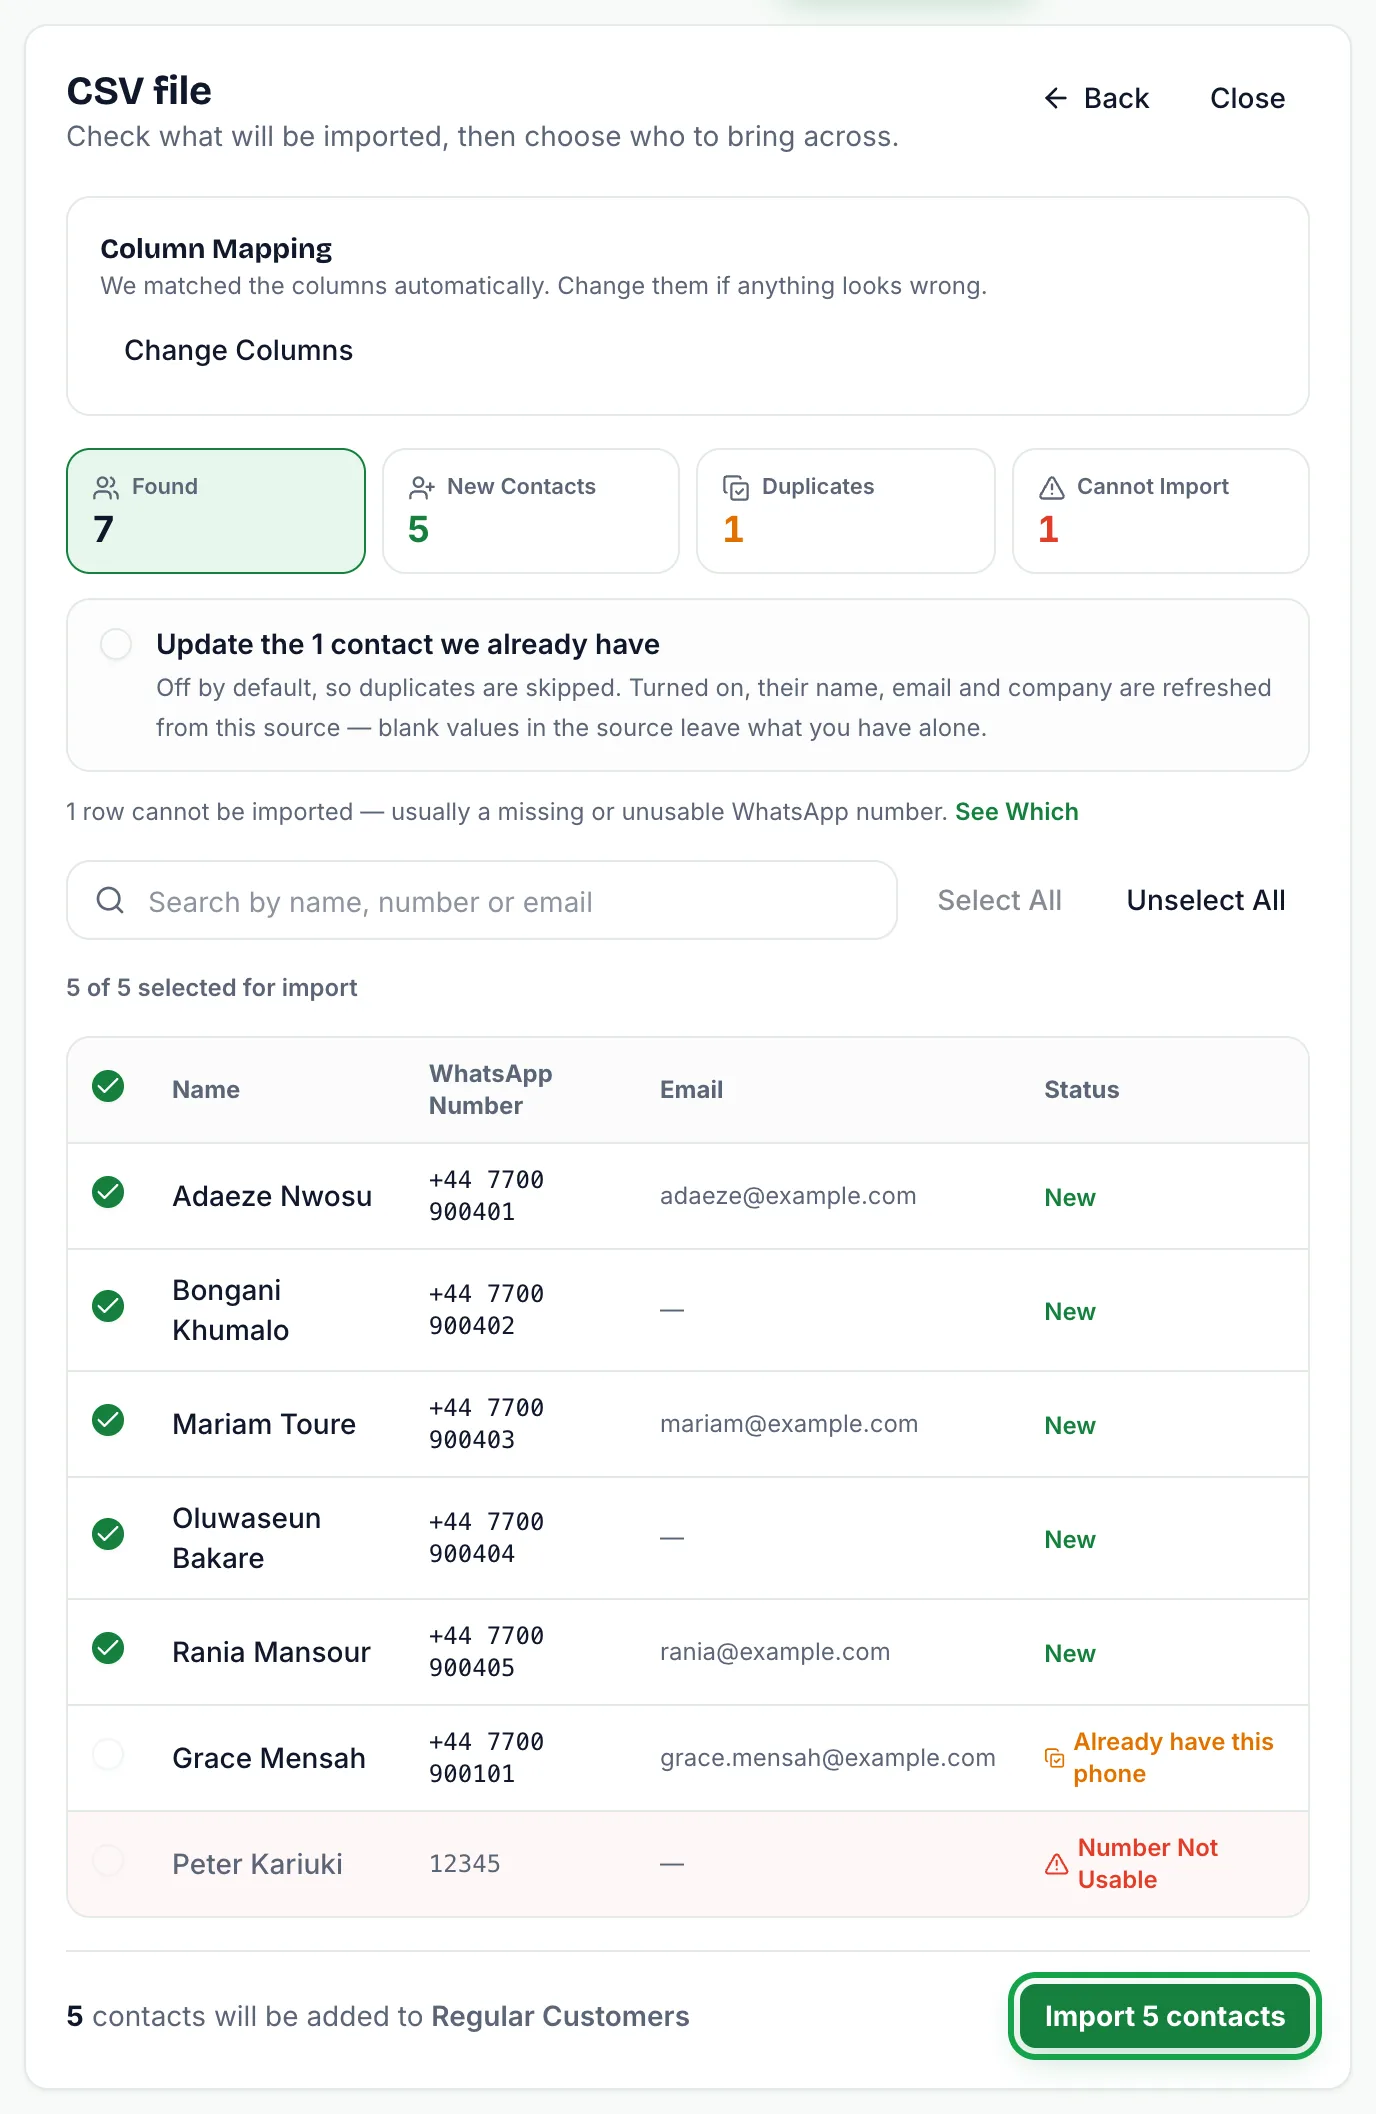
By default, every new contact is selected. You can:
- Search the preview by name, number or email
- Untick individual contacts you do not want
- Use Select all or Unselect all
- Tick the box to update the contacts you already have, shown when the file contains duplicates, to refresh their details instead of skipping them
Duplicates are skipped unless you tick that box. When you do, their details are refreshed from the file, blank cells leave what you have alone, and the updated contacts are filed in the book you are importing into.
For what each count means, read Duplicates, Invalid Numbers and Opt-outs Explained.
Step 6: Run the Import
Below the preview, SmartEngage states how many contacts will be added to your chosen book. Select the "Import" button, which shows the same number. The import runs in the background with a progress bar, and one import can run at a time per account.
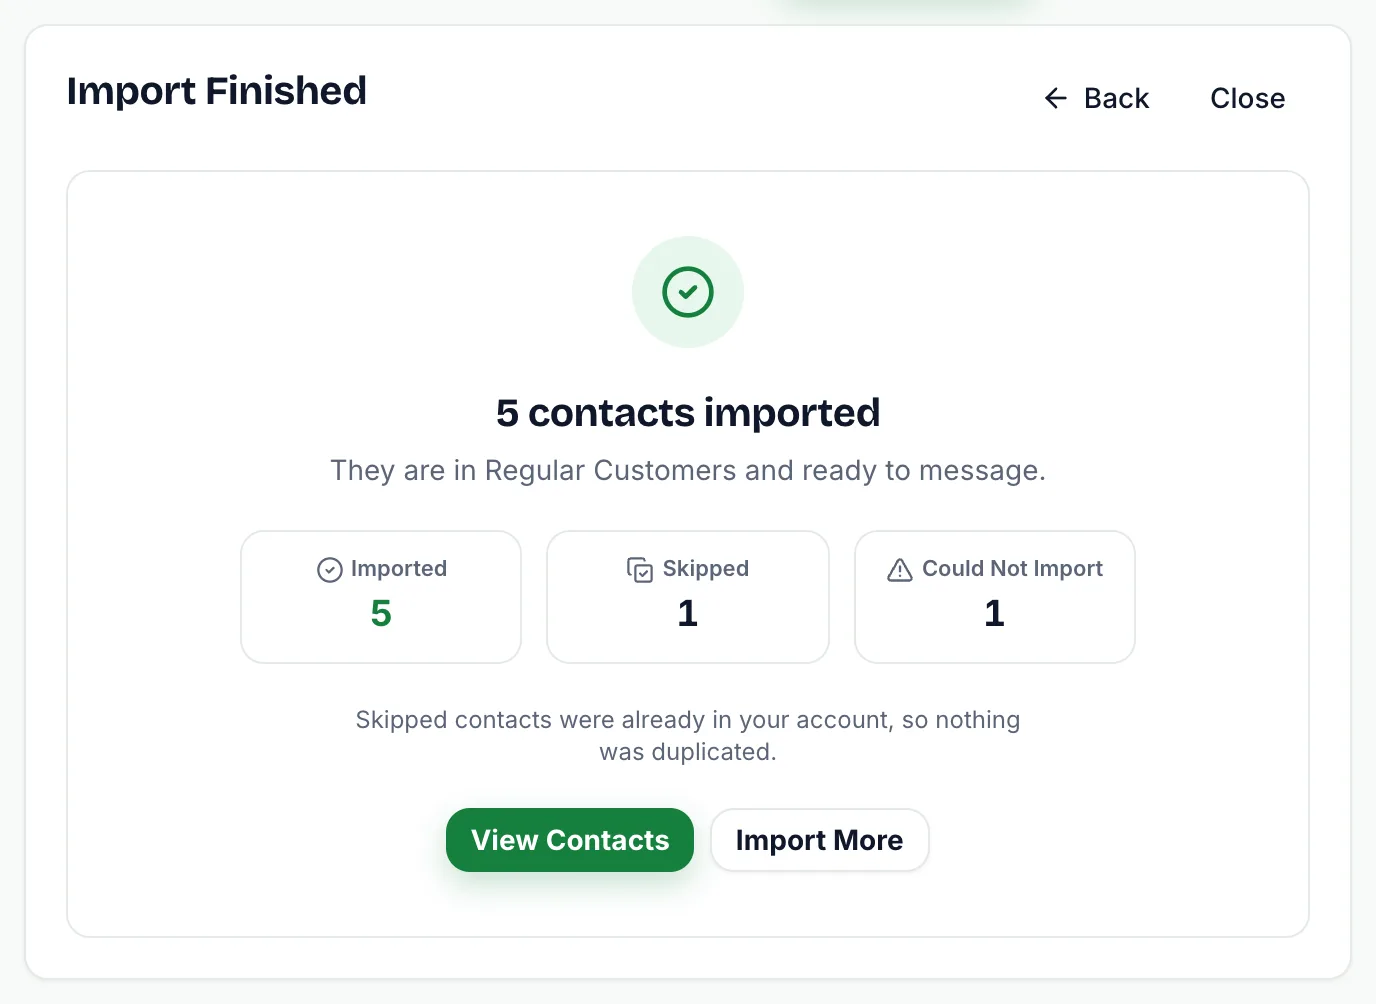
When it finishes, you see how many contacts were imported and three totals: Imported, Skipped (contacts you already had) and Could not import. Select "View Contacts" to see them in the book, or "Import More" to start another import.
Good to Know
- An upload stays ready for an hour. If you leave the preview longer than that, start again and the file is read afresh.
- If your plan limits how many contacts you can hold and the new contacts would not fit, the whole import is refused with a message saying how many more you can add. Nothing is half-imported.
- Rows with a bad number do not stop the import. The good rows are imported and the others are counted under Could not import.
Related Guides
Working with a workbook or a phone export? See How to Import Contacts from Excel or a vCard File.
If the preview shows rows you did not expect, read Fixing Contact Import Problems.
Next, prepare the message you will send: How to Create a Message Template.
Tagged
AudienceContactsGetting StartedReady to send safely?
Start free — no new number, no setup fee, no card required.
Keep Reading
 Account & WhatsApp Setup5 min read
Before You Connect WhatsApp: What You Need
Most failed WhatsApp connections fail for a reason that could have been fixed beforehand. Here is what to have in hand before you click Connect With Facebook.
Read guide Troubleshooting6 min read
Fixing Contact Import Problems
Symptom-by-symptom fixes for SmartEngage contact imports: files that will not upload, wrong column mapping, rejected numbers, duplicates and imports that stop.
Read guide Account & WhatsApp Setup5 min read
How to Add a Payment Method for WhatsApp
Connected but nothing sends? Meta bills WhatsApp messages itself, and needs a payment method on the right business portfolio. Here is how to add one and confirm it in SmartEngage.
Read guide