
How to Import Contacts from Google Contacts
If your business keeps its customers in a Google account, you do not need to export anything. SmartEngage can connect to Google Contacts with read-only access and fetch your saved contacts directly. This guide walks through connecting, importing, what comes across, and how to disconnect later.
SmartEngage
Google Contacts is one of the connected sources in SmartEngage. You sign in with Google, approve read-only access, and SmartEngage reads the contacts saved to that account. Nothing is imported until you have seen a preview, and nothing in your Google account is ever changed.
The whole process takes a few minutes. The first time, you connect. After that, the connection is remembered and you can fetch again whenever the list grows.
Before You Start
- A Google account with contacts saved to it.
- The ability to sign in to that account in the same browser.
- A contact book in SmartEngage to import into. You can use your default book or create one first.
Check that your contacts have phone numbers. SmartEngage messages people on WhatsApp, so a contact without a usable number cannot be imported.
Step 1: Open Import Contacts
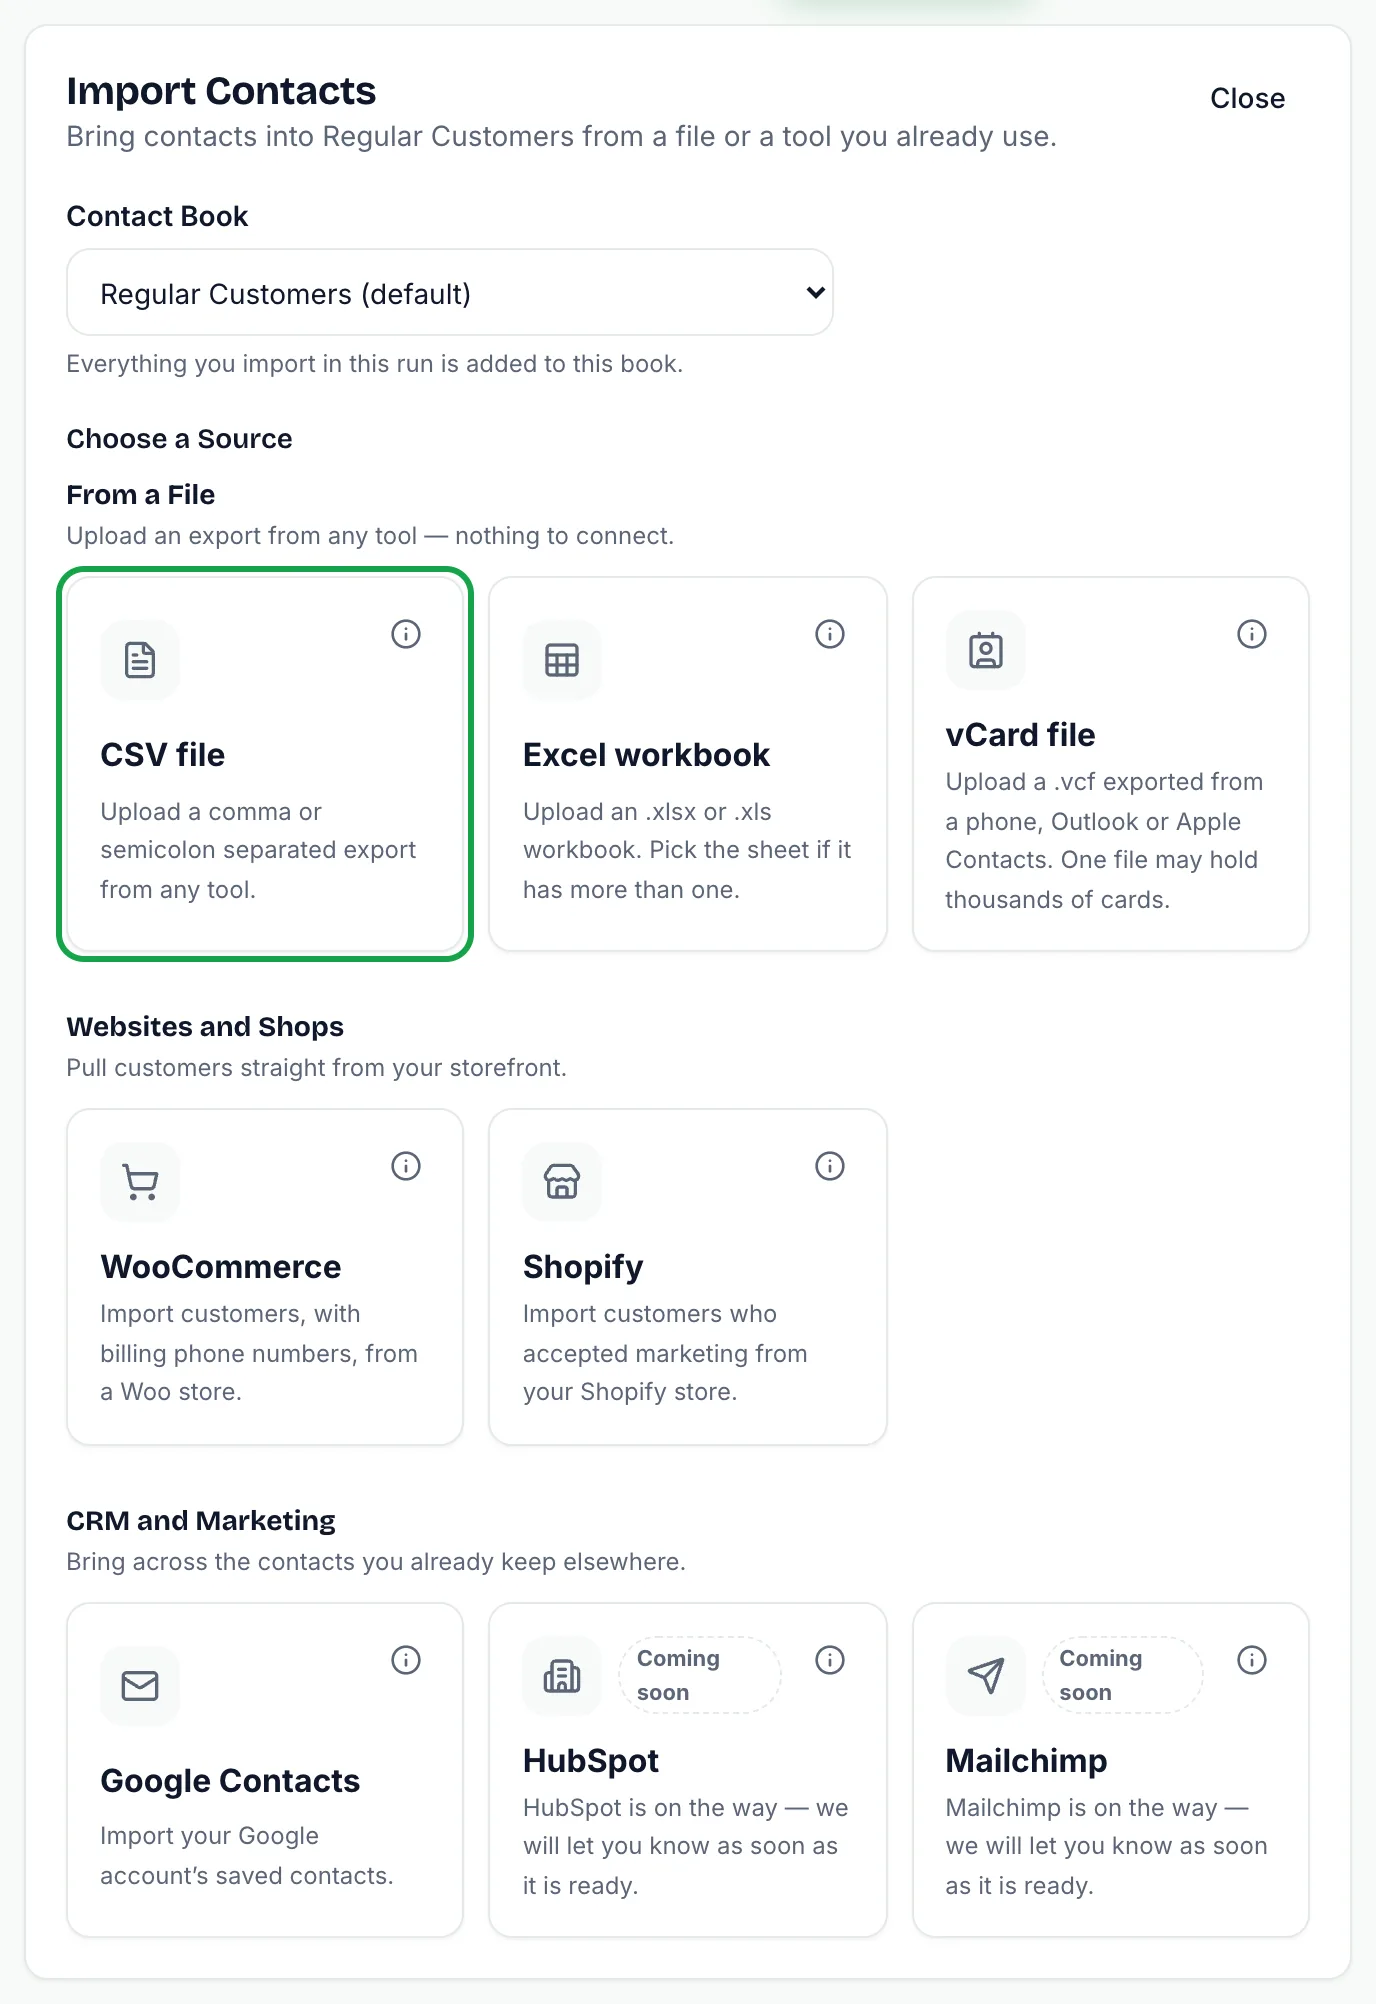
Go to the Contacts page and press Import Contacts. At the top of the panel, choose the Contact book the imported contacts should go into. Everything in this run is added to that book.
Under Choose a source, find the CRM and marketing section and select the Google Contacts card. If you want a reminder of the steps at any point, the information button on the card, or How to connect Google Contacts on the next screen, opens a short guide.
Step 2: Pick the Country for Local Numbers
The next screen asks where numbers without a country code are from. Many people save contacts as a local number, without the + and country code, and SmartEngage needs to know which country to apply. Numbers that already start with + keep their own code.
SmartEngage suggests a country, but check it. Guessing the wrong country would mean messaging the wrong person.
Step 3: Continue to Google and Approve Access
Press Continue to Google Contacts. The note beside the button explains that you will sign in on Google and come back.
You are taken to Google's own sign-in page. There:
- Choose the Google account whose contacts you want, if you are signed in to more than one.
- Review the permission. SmartEngage asks only for read-only access to your contacts.
- Allow it.
Google then sends you back to the Contacts page in SmartEngage, with the import panel open on Google Contacts and a message confirming that you are connected. The panel shows Connected, followed by the email address of the Google account.
If you cancel on Google's page, you come back with a message saying the connection was cancelled. The link to Google is valid for a short time only, so if you leave it open too long you will be asked to try again.
Step 4: Fetch Your Contacts
Press Fetch contacts from Google Contacts. SmartEngage reads the contacts saved to the account, page by page, and builds a preview. For a large address book this can take a moment.
If the account has no saved contacts, you will see a message saying Google Contacts returned no contacts to import.
Step 5: Check the Mapping and the Preview
Google's fields are matched to contact fields automatically. The Column mapping box confirms this, and Change columns lets you adjust it before importing.
The preview then splits the list four ways:
- Found: every contact read from Google.
- New contacts: those that will be added.
- Duplicates: people you already hold, matched on phone number or email address.
- Cannot import: rows that are missing a usable WhatsApp number, with the reason shown against each one.
Duplicates are skipped by default. If you would rather refresh them from Google, tick the option to update the contacts you already have. Their details are refreshed from Google, and blank values in Google leave what you have alone.
You can search the preview by name, number or email, and untick anyone you do not want to bring across.
Step 6: Import
The line at the bottom of the preview shows how many contacts will be added and to which book. Press the Import button, which carries the same count.
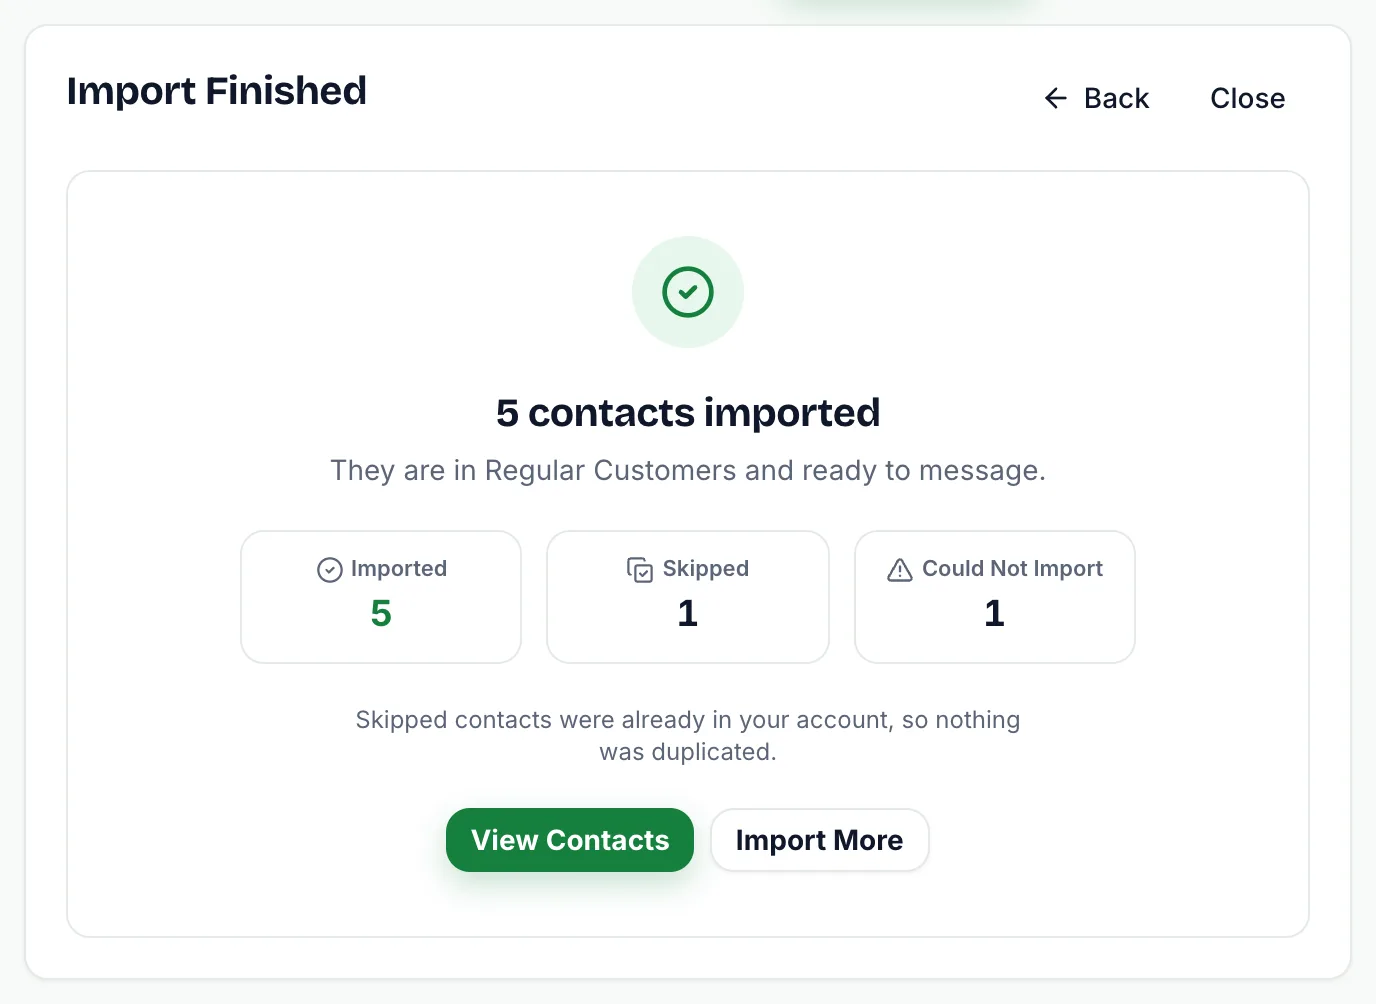
The import runs in the background with a progress bar. When it finishes, the result screen shows three numbers: Imported, Skipped and Could not import. From there, View contacts takes you to the list, and Import more starts another run.
What Comes Across from Google
Each imported contact can carry these fields from Google:
- Name
- Phone
- Company
- Job title
- Address
- Website
- Notes
A few details are worth knowing:
- Only contacts you have saved are imported. The addresses Google collects automatically from Gmail, listed as Other contacts, are not included.
- Where a contact has several numbers or addresses, the one Google marks as primary is used.
- Google labels do not come across as tags.
- Contacts are imported as opted in, so only bring across people who have agreed to hear from you on WhatsApp.
Importing Again Later
The connection stays in place, so next time you open Import Contacts the Google Contacts card shows Connected. Select it and press Fetch contacts from Google Contacts to read the account again. Contacts you already imported appear as duplicates and are skipped, so only new ones are added.
Google's authorisation is short-lived and SmartEngage renews it automatically in the background. If the card ever shows Reconnect, the renewal was refused, usually because access was withdrawn in your Google account. Select the card and continue to Google again to reconnect.
If a fetch or import fails, see How to Check an Import's Results and Fix a Failed Import.
How to Disconnect Google Contacts
Open Import Contacts, select the Google Contacts card, and press Disconnect beside the Connected message. SmartEngage deletes the stored authorisation straight away.
Disconnecting does not remove anything you already imported. Those contacts stay in your contact books until you delete them yourself.
Disconnecting removes access on the SmartEngage side. If you also want SmartEngage gone from the list of apps connected to your Google account, remove it in your Google account's security settings.
Prefer a File?
If you would rather not connect your account, export your contacts from Google Contacts as a CSV file and upload it with the CSV source instead. SmartEngage understands the Google export as it comes, with no rearranging of columns.
For the file route, follow How to Import Contacts from a CSV File.
Related Guides
New to connected sources? Start with What Contact Connectors Are and When to Use One.
Selling online as well? Read How to Import Customers from Shopify or WooCommerce.
Next, prepare the message you will send: How to Create a Message Template.
Tagged
ContactsGetting StartedIntegrationsReady to send safely?
Start free — no new number, no setup fee, no card required.
Keep Reading
 Account & WhatsApp Setup5 min read
Before You Connect WhatsApp: What You Need
Most failed WhatsApp connections fail for a reason that could have been fixed beforehand. Here is what to have in hand before you click Connect With Facebook.
Read guide Troubleshooting6 min read
Fixing Contact Import Problems
Symptom-by-symptom fixes for SmartEngage contact imports: files that will not upload, wrong column mapping, rejected numbers, duplicates and imports that stop.
Read guide Account & WhatsApp Setup5 min read
How to Add a Payment Method for WhatsApp
Connected but nothing sends? Meta bills WhatsApp messages itself, and needs a payment method on the right business portfolio. Here is how to add one and confirm it in SmartEngage.
Read guide